Friday, August 29, 2014

Toot Toot!

Here is my  train model (not finished in this picture) for my assignment, I named him Toot Toot :)


Say hi! 

Animation

Rigging and Animation:


This part proved to be more difficult than I'd have liked. At first it seemed easy, adjust the pivot points of the objects to be where the towbars were connected, but to actually animate with those proved to be a very hard task for me. 

I chose 3 animations to use for my final, which included:
  • Train and carts following a circle path, as they would on a railroad. I also added them bopping up and down for a bit of fun.
  • The train's wheel blocks (The rectangular boxes covering the wheels, this is what I called them here, because they're actually called wheel rods, but I kept saying the wheel rods were the cylinders that the wheels were attached to) coming out and waving to the camera.
  • The train stopping, crouching down, then zooming back to it's starting position, to allow for a loop effect. (This ended up not working quite right, but I couldn't fix it due to reason I'll state soon)
To get the train and carts to follow a path in a circle, I simple created a circle, and used path constraint on the objects to put them on the circle and start spinning. However, this created quite a few problems with my other planned animations, because as soon as I started to alter what happened to them on the timeframe, it would mess up the loop, and the train would reverse itself (This actually worked for my final animation idea, so that was lucky)


Eventually I managed to get the animations to a level I was mostly happy with, but there were problems with the objects occasionally flipping with any scale change, as well as disconnection between the models as they followed along the path. I was unable to fix these issues, but I'm still happy with my end result. 

Texturing

Texturing:


The next part was my favourite, texturing. I really wanted the train to look like a kid's toy, so very bright, basic colours were used to get the desired effect. 
I tried many different colour choices, and ended up with something different to this picture, but the idea is the same.


In the end, I chose to add small details on main train and back carts since it looked so plain without them. There wasn't much to say about this, I put the UV map into Photoshop and coloured it until I was happy. 


MDU105.3 UVs

UV Map:


Next part to complete was to unwrap the UVs of the train and carriages, and piece them together nicely. 

I was pretty rusty with this since the last model I unwrapped was the treasure chest from the last assignment, so it took a fair bit of time and effort to get this to look right. 


It started out well, everything was going as planned and even though those diagonal lines I mentioned earlier were still showing up on the UVs, they didn't seem to be causing any problems so I left them as is and continued unwrapping.


This ended up being the UV map for the Driver Carriage. The window sill edges weren't included here as I did them later. The carriage roof didn't seem to want to break and relax correctly, so I had to compromise by separating a lot of the polys to make it work. Obviously this could have been done more efficiently, but I was okay with my work on this.


When it came to the wheel rods and the train front cylinders, I wasn't entirely sure how to unwrap those properly. So at first I tried to break and relax all of the long edge lines, and project the UV from the view of the train's front. The end result was a spiderwebbed circle shape, and a half-circle one as well for the large front cylinder (due to the fact that the bottom polys on the cylinder were hidden and I assumed I could unwrap it without those polys selected).


I left those as they were and continued on, with my only real struggle after that being the towbar hole, and deciding which viewpoint to project from. Eventually I realised that since it was only a very small, and mostly unnoticed part of the model, it wouldn't matter too much for detail, so I just decided to make it all one colour and project side-on, rather than top-down and relaxing the vertical poly edges. This meant that the texture would simply be applied to both sides.


After a lot of frustration and confusion, I eventually managed to unwrap and map the UVs in a way I thought would work correctly, and decided to move on to texturing.

That's when I realised something... I'd forgotten to apply a checker material to my model at the start, so all of my UVs would probably be completely wrong, how right I was.


Once I went back and applied the material to the objects, I realised how terrible my unwrapping was, and had to go back and fix everything. There were some parts that I just couldn't understand and fix, such as the sides of the back carts, and also the inner cart polys as well.


However, in order to fix the cylinders, I simply did two separate projections, one of the cylinder face, and one of the cylinder body itself side on. 


After more time and frustration, I fixed my UVs and got to work on texturing them. 


MDU105.3 Final Model Touches

Final Model Touches


By this stage I was fairly pleased with how my model was looking, and so all that was left was to add in a few extra bits, like the wheel rods and the towbar bolt/pin, and make sure everything lined up correctly. 


Initially I modelled the pins with a square shape, simply because I thought it would be easier to unwrap later on. However, I then realised that it was less realistic because the carriages would simply not turn nicely or believably. The only solution was to make rounded bolts. I also had to change the towbar hole as well, so pro boolean was used again. 


This will enable the parts to all move together nicely, and hopefully won't be too difficult to UV Unwrap.

MDU105.3 Carriages

Carriages:


As with the last blog post, I had talked about adding carriages, and so I did.


I realised that I also needed to think of how they would connect and move together in a line, so I added towbars that could link up with some kind of bolt/screw/pin that could be used to keep them together. 

After this point, I decided that I didn't like how flat the Driver Carriage looked with those windows. I thought it was too flat, and in order to seem more realistic it had to have actual edges and substance. At first I wasn't sure how this could be achieved, and so I researched ways to get the look I desired, and was directed towards the use of Pro Booleans. (YouTube, 2011)


 In order to get the final result I wanted with the windows, I had to create a box that would be the shape and size of the windows I wanted, place them in their desired positions on the Drivers Carriage. Then I had to select Pro Boolean, and pick the window boxes. This then lead to the boxes being deleted where they were, and deleting the part of the Driver Carriage wall that they had touched as well. This was the result I had originally wanted, and so I was very happy after learning the method. I then went on to do the same for the wheels and their connecting rods. 


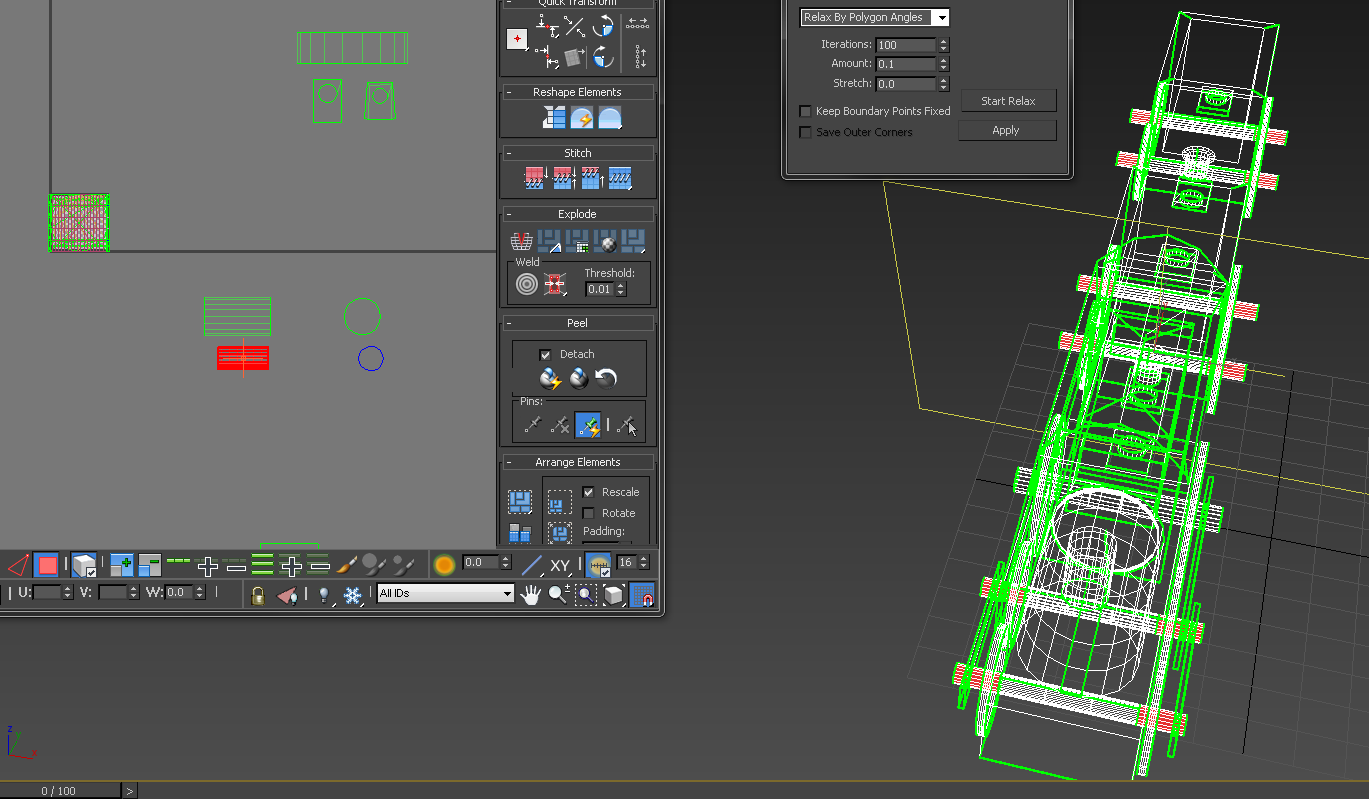
The only thing I had a problem with when it came to this method was that it left my UVs with an odd diagonal line coming from the bottom of the Driver Carriage box to a window corner. However, since it wasn't really affecting anything, I left it as it was.


----------------------------------------------------------------------------------------------------------------------------------

YouTube,. (2011). How to create 3d window in 3d max. Retrieved 12 August 2014, from https://www.youtube.com/watch?v=mZUlyig7vX8


MDU105.3 Idea and Model

Beginning:


My initial idea was to do more of a Dragonoid mechanical piloted robot, which then changed to a Flying dragon, which then changed to a Viking longboat. However, these ideas were a bit far-fetched and weren't approved.
So, of course, my next idea was to model a toy train. Logical thought progression going on here.

This was the basic beginning of my model, made from boxes and cylinders which were joined together appropriately.


This model was obviously very basic, so I then decided to add some windows for the Driver Carriage. I first tried this by adding swift loops where I wanted the windows to be, selecting the polygons I wanted as the windows, and then deleting them. At the time, this seemed like the logical idea. 


This seemed okay for what I wanted, and I didn't really know how to make it look thicker, so I left it for the time being. 
I also then went on to bevel the roof, extend it out further either side, and bring the outer edges down to make a slanted roof. By this point I thought it was looking okay, and considered adding more carriages to give it more complexity.