3D Production Pipeline (Animation):
Step 1: Intro - Concept Idea & Research
All of the animation studios that I looked into said that the first thing they did was get their original idea, and research how to make it look how they want it to. From researching character designs, to colours, backgrounds and everything in between, the first step in the pipeline is research.Step 2: Script
The next step is usually to take all of the research and ideas, and write the script.Step 3: Storyboarding, Music and Dialogue
The script is then given to the storyboard artists, where they then take the words of the script and turn them into pictures and actions. The storyboard then has to get approved by the directors and producer, to then be turned into a story reel, so that you can see how everything flows together.Music and dialogue are then incorporated, and for months following, the overall look of the animation is given life, to be tweaked and refined later.
Step 4: Visual Development
The story reel is then taking by a visual department, where the overall look of the film (style, tone, colour, etc.) is designed and decided for every sequence. This process involves thousands of drawings of each individual item in the animation, big and small.Step 5: Casting / Voice Recording
Voice actors are chosen for their voices, not their looks. While recording the dialogue scenes, the voice actors may be video recorded as well to give artists a reference for facial expressions for their animated characters.Step 6: Modelling
Modelling artists digitally sculpt each object in the animation, starting with a wire frame structure, also known as an armature, which is used to break the character's design down into workable shapes, so that it can be rigged to move in whatever way necessary.Step 7: Rigging
"Riggers" get the 3D model of the objects and characters, and decide how they should move, by determining where the bones, muscle and fat would be and how realistic their movements should be. They incorporate joints and pivot points, to make the character (face, body, hair, clothes, objects) move convincingly. The rigger then work with the animation department to make an extensive set of controls so that they can animate every part of it for the animation.Step 8: Layout
The first step in the layout is the animatic, where artists draw basic shapes, backgrounds, etc., to determine how each scene will play out. This helps make the final decisions for character placement, camera angles, movement, timing, lighting, and so on. The animatic should map out the entire movie before the animating process begins.Step 9: Character Animation:
This is where the controls created in the rigging phase are used to animate each character in the scenes. They match the actions of the character to the dialogue, perfect the timing, and so forth.Step 10: Surfacing
Surfacing artists add colours and textures to the animations to make each object look more realistic to the desired effect. (Wool, hair, metal, dirt, etc.)Step 11: Effects
Animations are applied to all things that aren't 'living' characters (trees, fire, waves, wind, etc.)Step 12: Lights
Lighting effects are added to everything, it illuminates the whole scene and sets the atmosphere that supports the whole story. It leads the viewer's eyes to the main critical elements of the frames so the audience's attention is drawn to the exact spot the storyteller wants them to look.Step 13: Sound FX:
Sound designers record and make sound effects to add to the animation, such as rustling leaves, wind howling, footsteps, etc.The next step in this process is to add the music, this part is crucial in getting the audience to connect with any emotional parts of the story.
Step 14: Final Mix:
The final step is to assemble the dialogue, music and sound effects into the film, and adjust them accordingly to be added as tracks and mixed into the final film.3D Production Pipeline (3D Modelling):
Step 1: Pre-Production:
The initial phase of making a 3D model, where the concept ideas for overall look, style, etc., are determined for creation.
Step 2: Modelling:
Going off what was decided in the pre-production stage, modellers then start building the assets from scratch using a variety of 3D modelling methods and programs. Every 3D asset can be made from characters to props, backgrounds, miscellaneous objects, etc.
Anything that will be used later on in the pipeline is made in this stage.
Step 3: Painting and Texturing:
A texture artist will then take the 3D models and give them colours and texture. It's possible to add a variety of different textures to enhance the realism of the objects, including how reflective or shiny an object is for example.
Step 4: Rigging:
Control points are created on the 3D models, to result in a skeleton of sorts, that the animators can then use to move the objects and characters how they like, in whatever way is believable in the animation.
These rigs are a necessity to any animated 3D models.
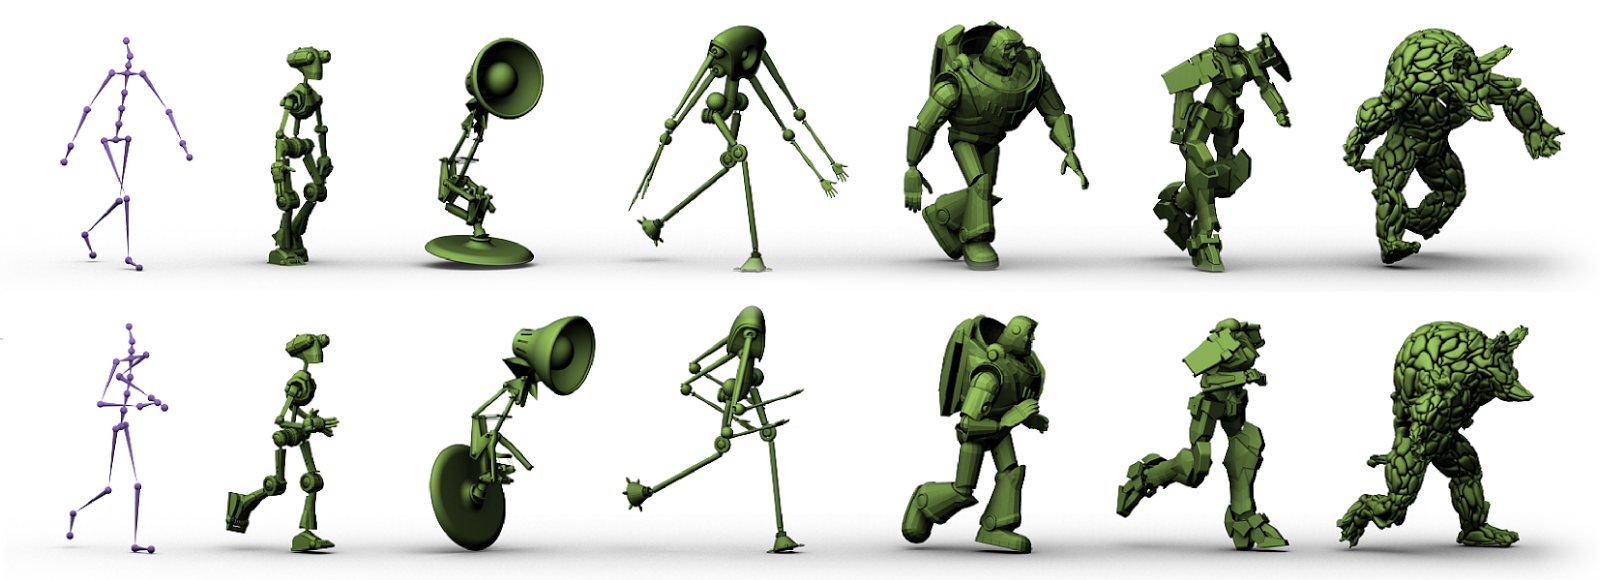
(Bharaj, Thorm, Seidel & Theobalt, 2011)
Step 5: Animation:
The animation skeleton created previously is then used in the animation, to move the characters and objects in whatever way needed.
"It is an animator's job to make the 3D characters and objects come to life in a believable way." (Boudon, 2013)
Step 6: Dynamics:
This step is where simulations and real-world forces are created, such as models shattering on impact, explosions, etc.
Step 7: Lighting:
This is where the light in each scene is determined, and how it works in correlation to each object in that scene. The direction the light is coming from, how strong the light is, what colour it is, all is determined in this step.
Step 8: Rendering:
This is the process where you take the 3D object you have created, and output the files for it to be used in a variety of ways. (Photo, animated film, portfolio)
This is where you add the finishing touches that make your object look its best. Adding shadows, lights, other textures or details until you achieve the end result you're after.
----------------------------------------------------------------------------------------------------------------------------------
Researching this process has been incredibly helpful in understanding exactly what animation studios must go through to create a good animated film and 3D models. The amount of time and effort spent on such a task is awe-inspiring. I'll make sure to remember this process if I'm ever going to criticise a single animation again!
~ Dakota Jade ~
------------------------------------------------------------------------------------------------------------Bharaj, G., Thorm, T., Seidel, H., & Theobalt, C. (2011). Automatically Rigging Multi-component Characters. Resources.mpi-inf.mpg.de. Retrieved 15 June 2014, from http://resources.mpi-inf.mpg.de/AutoRig/
Bim, J. (2002). What is 3D Rendering?. 3drender.com. Retrieved 15 June 2014, from http://www.3drender.com/glossary/3drendering.htm
Boudon, G. (2013). How Does a 3D Production Pipeline Work - Understanding th Basics. Digital-Tutors Blog. Retrieved 15 June 2014, from http://blog.digitaltutors.com/understanding-a-3d-production-pipeline-learning-the-basics/
Dreamworksanimation.com,. (2014). DREAMWORKS ANIMATION. Retrieved 15 June 2014, from http://www.dreamworksanimation.com/insidedwa/productionprocessJimovelmen.com,. (2014). Untitled Document. Retrieved 15 June 2014, from http://jimovelmen.com/csula/syllabi_use/Art498_Spring10_supp.htm
Playgallery.org,. (2014). PLAY Stories: Classes & Assignments: the production pipeline of a 3D animation. Retrieved 15 June 2014, from http://playgallery.org/stories/animation/
No comments:
Post a Comment